
Fills manager
Contents
The Fills manager allows you to:
- View the transaction history
- Create fills manually for modeling purposes
- Move fills between the strategies
- Edit and delete fills
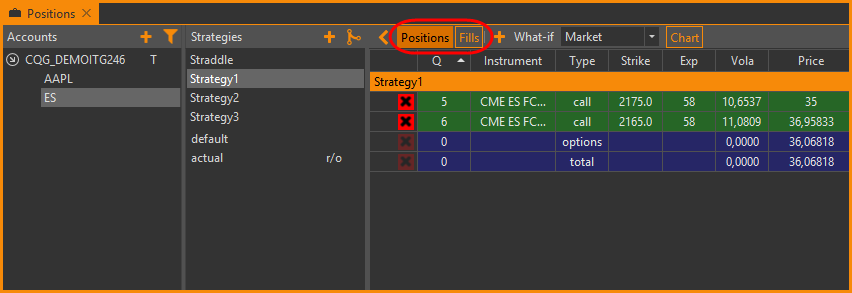
To open the Fills table click the Fills button on the toolbar in the Positions manager.
To view all fills in the strategy right-click on the strategy and select the Display fills command. To view the fills of a certain position, right-click on the position row and select the Display fills command.

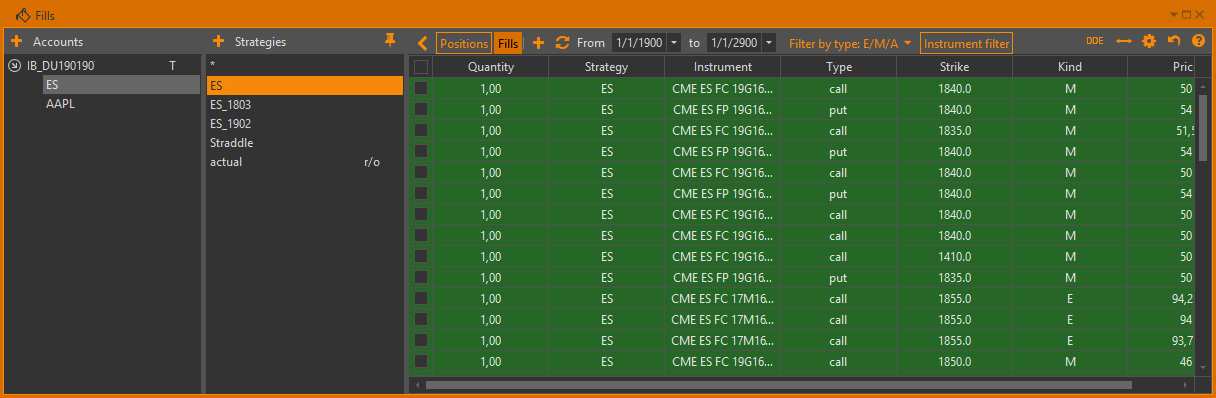
The Fills form consists of three blocks:
- Accounts – contains a list of accounts and underlying assets (for details, see Accounts)
- Strategies – contains a list of strategies (for details, see Strategies)
- Fills grid – contains a table of fills
To view the fills you need to choose Account → Underlying asset → Strategy.
To view all fills on the underlying asset, including fills that are not tied to the strategy,
you need to choose the  button in the Strategies block.
To view all fills not linked to a strategy, click the
button in the Strategies block.
To view all fills not linked to a strategy, click the ![]() button.
button.
The Fills block includes the following columns:
Time – the fill's date and time
Price – the fill's price
Quantity – the fill's size (sizes greater than zero indicate buy fills, sizes less than zero indicate sell fills)
Strategy – the name of the strategy that the fill belongs to
Instrument – the ticker symbol of the fill's instrument
Type – the fill's instrument type:
- stock means an equity or any other asset
- fut means future contract
- call means call option
- put means put option
Strike – the fill's instrument strike price (displayed only for options)
Kind – the fill's type
Exchange ID – the fill's identification code assigned by the data source
Order ID – the order code in the trading system on which the fill was executed
The fills list is updated automatically when OptionWorkshop receives a fill from a data source.
You may also refresh list manually by clicking the  button.
Fill types
There are 3 types of fills: external, manual, and adjustment.
Manual fills
A manual fill is a fill created manually by the user in the Fills manager. To create a fill:
Click the Add new fill button.
Fill out the fields in the opened window.
The Quantity and Price fields are required. Sizes greater than zero indicate buy fills, while sizes less than zero indicate sell fills.

Click the OK button.
If a strategy name is not specified the fill will be routed into a strategy according to the routing conditions. More in the Fill routing.
For example, we create a sell fill on the GOOG financial instrument with the size of 10.
If we have an open position on this instrument with quantity 5, the position's quantity will change to -5.
Otherwise, a new short position with quantity -10will be created.
So, the manually created fills are applied to positions just like external fills received from a data source.
Adjustment fills
The adjustment fills are created automatically when you edit the position quantity/price in the Positions manager.
For example, if you change the position's quantity with 5 contracts to 10,
an adjustment buy fill with quantity 10 will be created in an appropriate strategy.
The adjustment fill can be deleted. It means, that all manual corrections of position will be canceled.
This type of fills is not available for editing.
Adjustment fills are required for data consistency and represent manual position changes only.
External fills
The external fills are loaded from the external system. If an order was not bound to the strategy the fill will appear in the Fills manager without reference to any of the strategies. The position on this instrument will not change. If the fill was bound to the strategy and there is an open position on this instrument, it will be adjusted. If there is no position on this instrument, a new position will be created in the corresponding strategy.
Editing fills
There are multiple options to edit a stored fill’s parameters:
Edit the fill price and size
Move the fill into another strategy
Delete fills from the strategies
Delete the fill entirely
Instrument:
 – view order book (see Order book)
 – placing orders (see Orders manager)
 – view Historical chart (see Historical chart)
 – add the financial instruments to Instruments Board (see Instruments Board)
 – search instrument in the instruments list (see Instruments tree)
When you change the fill, a position on the instrument will be adjusted correspondingly to your fill changes.
Editing price, size and direction
To edit a fill’s price, size and direction:
Click on the desired fill to edit.
Right-click on the fill to open the context menu.
Select the Edit fill command. The following dialog will then pop-up.

Edit the fill's parameters.
Click the OK button or press the Enterkey to confirm your input.
A fill's price or quantity cannot be equal to zero. Adjustment fills are not available for editing.
Moving fills
To move a fill:
Click on the desired fill to move in the table.
Right-click on the selected row to open the context menu.
Select the Move to strategy command in the context menu. After that, the following dialog will pop-up.

Select a target strategy name from the drop-down list or enter it in the text field.
Click the OK button or press the Enterkey to confirm your input.
The other way is to drag several fills simultaneously to a target strategy.
The fills you have selected will be moved into the strategy with the specified name. Note that you may enter any valid strategy name, even if there is no strategy with that name. Valid strategy names include any non-empty string, excluding actual.
You can only move fills on the same asset within the same account.
Deleting fills from the strategy
Select a fill by clicking on it, then open the context menu by right-clicking on the fill and select the Clear strategy command.
The fill will display in the Fills manager without reference to a strategy.
To view the fills that are not tied to a strategy, choose the
option in the Strategies list.
Deleting fills
Right-click on the fill and select the Delete command to delete the fill from the database. Adjustment fills cannot be deleted.
Note that no confirmation will be requested when fills are deleted. Deleting fills is irreversible.
Fills routing
You can configure the fill-to-strategy routing for a trading account. You need to bind the exchange/underlying asset/instrument to the strategy, using the following steps:
Right-click on the trading account and select the Configure fill routing command.

This will open a form with trading instruments, grouped by series, underlying assets and exchanges. A dropdown list with strategies is available for each row. If you expand the list, you will see the strategies created in OptionWorkshop, and the default strategy. When the fill is received and it has no strategy name set, it will be routed automatically into the default strategy.

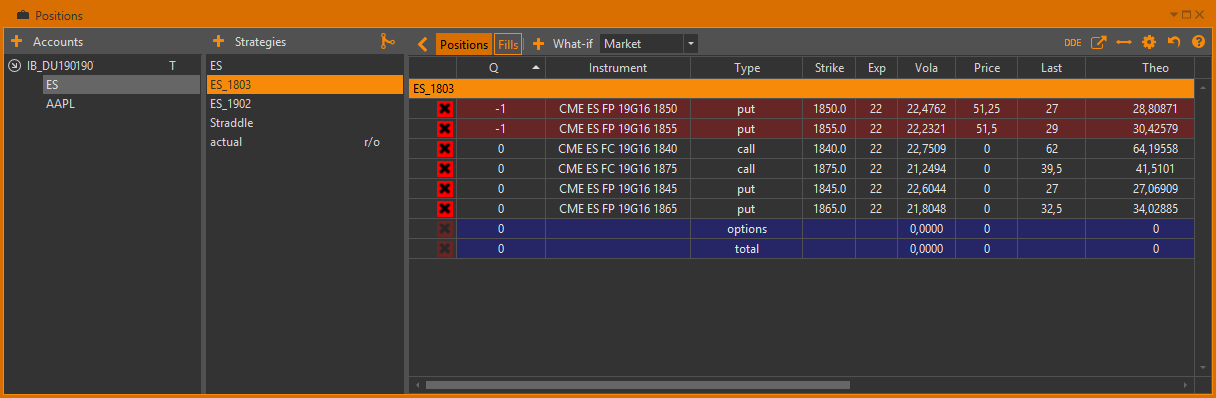
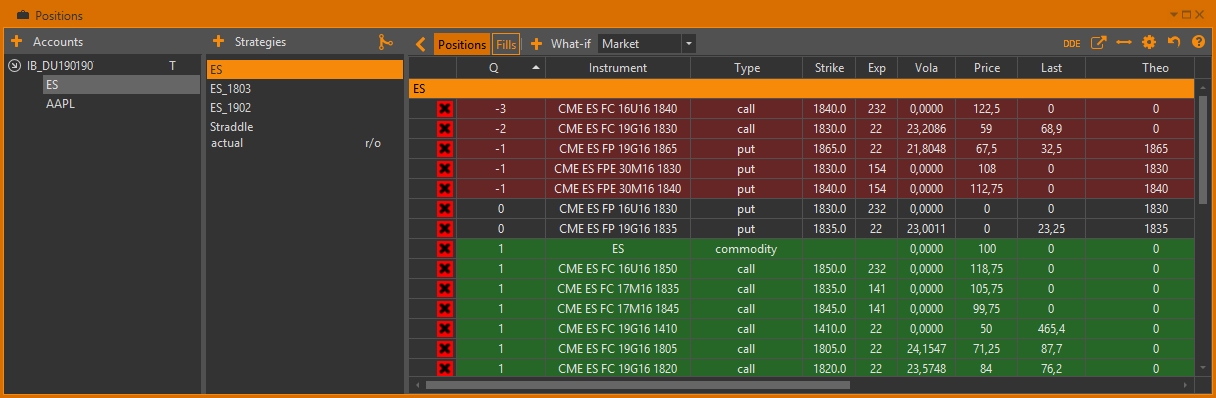
Select a strategy from the drop-down list or enter a new strategy name (it will be created automatically). For our example we have specified for the
ESasset the strategy with same name. Child elements have inheritedESstrategy name from their asset.To rearrange old fills, you need to set the switch on the bottom panel of the form and choose the date from which to sort the fills. The operation may take some time.
Click the OK button.
Only real and manual fills are sorted.
The old fills were moved to the created strategy after rearrang.

All affected positions were updated accordingly to the fills.
When a fill is received (or created manually) and it has no strategy name set, it will be routed into a strategy according to the routing conditions
Commission for the fill
In OptionWorkshop, you can set the fill’s commission. The commission is configured separately for each account. To do this:
- right-click on the account;
- select the Set commission command in the context menu;
- specify the commission size for the exchange/underlying asset/futures/option series.

The total сommission for the contracts is displayed in the Commission column in the Positions table.

The commission for the fill is calculated by this formula: the number of contracts in the fill multiplied by the commission size for the contract. The commission for the position is a total commission of all fills in the position. The total row shows the total commission for all positions.
Bulk operation
In addition to editing an individual fill’s parameters, the program allows you to carry out the following operations on multiple fills simultaneously:
- Moving fills to another strategy
- Deleting fills from the strategies (to view the fills that are not tied to the strategy,
choose the
option in the Strategies list)
- Deleting fills from OptionWorkshop
To edit multiple fills:
- Choose more than one fill simultaneously by selecting fills while holding down Shiftkey or by checking the appropriate checkboxes of each desired fill in the first column of the table.
- Click the Bulk operations button or right-click on the fill to open a context menu.
- Select the desired operation.
Filter settings
There are numerous filtering options:
- by fill time
- by fill type
- by instrument
By fill time
You may select a date and time range using two date-time controls: one specifies the beginning of the time range and the other specifies the end of the time range.
Initially, date and time range is set to the current day only.
If you need to view fills within a different time range, enter the desired time range in the From and To fields.
Then press the Enterkey or click the
button to apply the filter.
Note that only a 24-hour time format is accepted.
By fill type
To filter fills by type select the type to activate the switch in the dropdown list. The filter will apply automatically.

By instrument
In order to filter fills by instrument:
Click the Instrument filter button on the top panel.
Select the Selected instruments option.

Select the instruments you want to display. There are quick selection buttons into the Fills manager’s instrument filter: Select all and Deselect all.

Click the OK button.
Fills complying with the filter will be shown in the table.
Column settings
There are settings to configure the Fills manager window. Settings are configured using the toolbar, located above the main table.
To configure which columns will be visible:
Click the
 button.
Select in the checkboxes to specify which columns you wish to see on the fill table.
Click the OK button to apply changes.
Columns can be also reordered.
Click-and-hold the left mouse button on the column you wish to move,
then drag it to the desired location while holding the left mouse button down.
Release the mouse button to drop the column in its new place.
You can also use the  and
and
 buttons in the Column selection window.
To return to the default column order, click the Reset to default button.
buttons in the Column selection window.
To return to the default column order, click the Reset to default button.
To align the columns' width to fit the window, click the  button.
Column settings will be saved and applied automatically the next time you open the Fills manager window.
If you want to return to default settings, click the  button.
