Strategy-based position management
Contents
- Money limits Adding accounts Renaming accounts Deleting accounts Commission for the fill Fill routing Hiding unused accounts
- Actual strategy Total strategy Adding strategies Copying strategies Adding comments to the strategy Renaming strategies Deleting strategies
- Adding positions Editing positions Moving positions Deleting positions Excluding positions from the calculations Сhanging the positions’ opening price Column display settings
The Positions manager includes a range of analytical functions that allow you to:
- Work with trading accounts
- Manage strategies
- Create, edit, and move positions (real and modeled)
The Positions manager opens by default when you launch OptionWorkshop,
or by clicking the  button.
The Positions form is divided into three blocks:
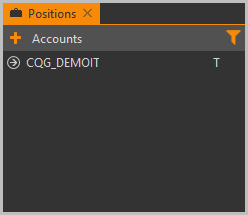
- Accounts – accounts and asset portfolios (underlying assets)(for details, see Account) [1]
- Strategies – strategies (for details, see Strategies) [2]
- Positions – open positions on the strategy (for details, see Positions) [3]

When OptionWorkshop successfully connects to a data source,
it fills the list of accounts with data loaded from an external system.
For example, on the screenshot below, OptionWorkshop has loaded two accounts: Account1 and Account2.
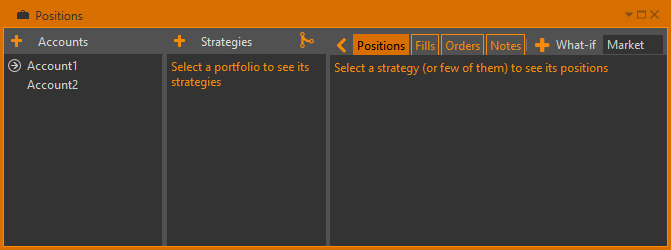
If an account contains any positions (and thus any strategies) then its item in the account list is expandable
by clicking the  button.
When expanded, it shows a sublist of strategy groups – these groups are called asset portfolios.
Each portfolio is associated with a specific asset and contains only strategies on this asset – so strategies are grouped by their asset.
On the screenshot below,
 Account1 contains three portfolios: AAPL, AAOI, and GOOG.
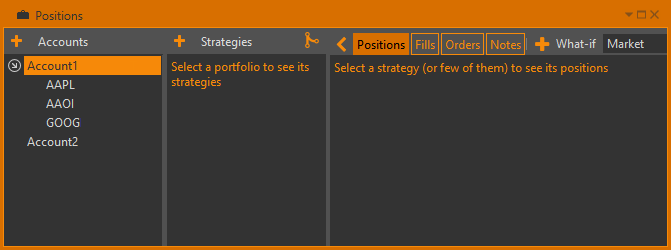
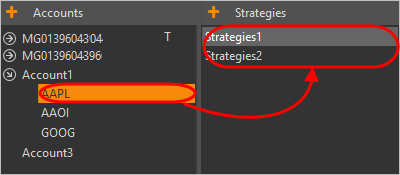
By selecting a portfolio in the sublist we get a list of strategies on the selected asset contained in the selected account.

Choosing a strategy in the left block will open a list of positions.
Accounts
The Accounts section contains a list of accounts available for trading. There are two account types:
- Trading, loaded from the data source. The
Tmark is displayed next to the account name. - Custom, User-Created.
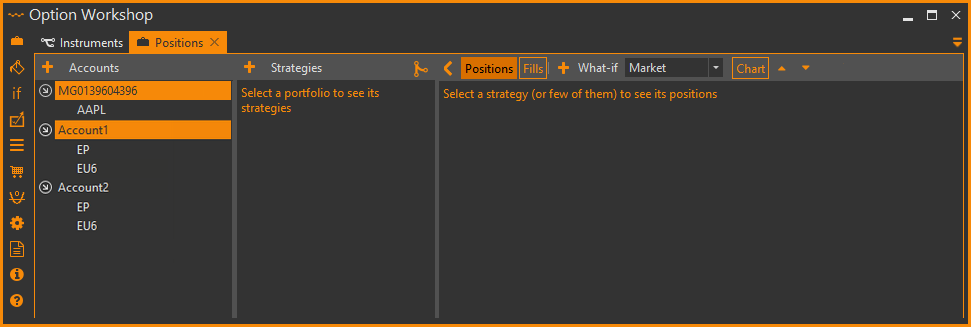
The L mark indicates accounts, which are used by any trading automation tools.
Money limits
You may view the trader's account limit by right-clicking on the account and choosing the View money limits command from menu.
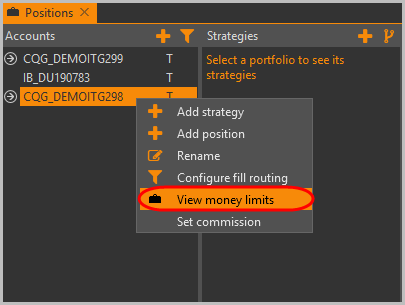
This command is available only for trade accounts.
On the following window, you can find the information about Account1.
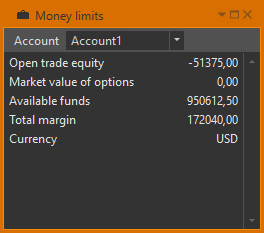
The set of parameters depends on the trading system.
Adding accounts
Along with accounts loaded from the data source, OptionWorkshop allows you to create custom accounts (for example, you may wish to create a separate account for modeling strategies). To create a new account:
Click the
 button on the toolbar above the accounts list.
You will see the following dialog:
Enter the desired account name in the text field.
Click the OK button (you also may press the Enter key on keyboard). Note that the account name cannot be empty.
If you create an account and then another account with the same name is loaded from the data source, these two accounts will be merged into one single account. The list of strategies and positions of the loaded account will be added to the existing one.
Renaming accounts
To rename an account:
Double-click on the account name or right-click on the account and select the Rename command from the menu.
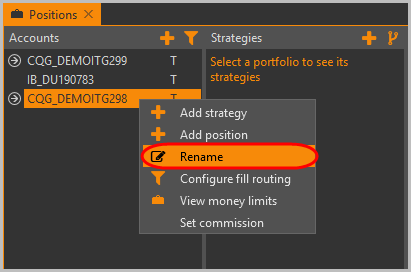
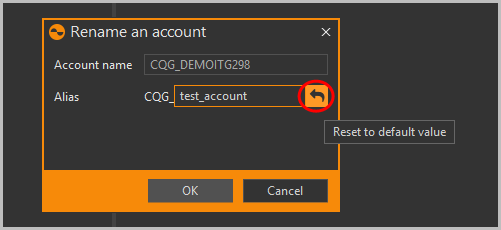
Enter the account name in the Alias field.
Click the OK button.

To return to the original account name, click the Reset to default value button.
Deleting accounts
To delete an account:
- Right-click on the account to be deleted.
- Select the Delete command from the menu.
- Click the OK button in the information message to confirm the action. All strategies and positions on this account will be deleted.
The trading account cannot be deleted.
The account used by automated trading features (Lmark) cannot be deleted
(see Delta hedger and Market maker).
Commission for the fill
In OptionWorkshop you can set the commission size for the fill. The commission is configured separately for each account. Information about how to do this is given here.
Fill routing
When you create a new order you can specify a target strategy to be filled by the order. Orders placed by DH or MM have the strategy field set to the MM/DH trade strategy. If a strategies’ name is not specified and the fill-to-strategy routing is not configured the fill will be routed to the default strategy. Information about how to configure the fill-to-strategy routing for a trading account is given here.
Hiding unused accounts
To hide unused accounts from the accounts list:
Click the
 button.
Uncheck the box next to any accounts you want to hide and click the OK button. Click the Select all button to select all accounts with one click, click the None button to clear selection.
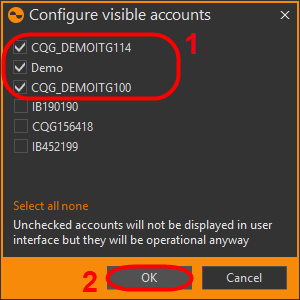
The selected account will appear in the list. Hidden accounts are available for use when you create new fills, add positions. Check the box next to any accounts in the Configure visible accounts form to show it in the list again.
Strategies
A strategy is a set of positions. To view the strategies on any underlying asset, you must select an instrument in the Accounts section. The list of available strategies will display in the Strategies section.
There are 4 types of strategies:
- Actual strategy – created by the system. Contains positions that are loaded from a data source
- Custom strategy – a user created strategy. Contains user and Market maker/Delta hedger/FOS created positions
- Default strategy – created by the system. When the fill is received and it has no strategy name set, it will be routed automatically into the default strategy
- Total strategy – created by the system. Contains the net positions of the selected strategies
The L mark indicates strategies, which are used by Market maker, Delta hedger, FOS.
The r/o indicates the actual strategy, which cannot be changed.
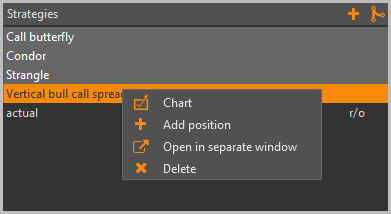
Right-clicking on the strategy will open a context menu with the following commands:
- Open/Close – place orders on all instruments in the strategy, see Placing orders for a whole strategy
 – add Delta hedger, see Delta hedger
 – view Strategies chart, see Strategies chart
 – add position (not for actual strategy), see Position
 – rename strategy (not for actual strategy)
 – copy the strategy
 – change the strike of all option positions in a strategy, see Changing the strike of option position
 – view fills, see Fills manager
 – view positions in a separate window
 – remove all positions
 – delete fills (not for actual strategy)
The context menu for several selected strategies displays commands:
Build strategy charts,
Open the Add positions form,
Open positions in a separate window,
Delete strategies.
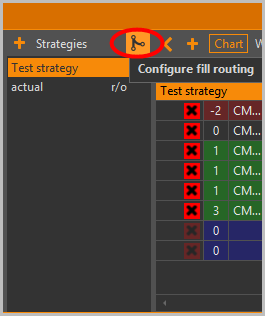
Click on the  button
to open Configure fill-to-strategy routing form (see Fills routing (fills sorting by strategy))
Actual strategy
For trading accounts, OptionWorkshop creates a special strategy named actual in each portfolio.
This strategy always shows up-to-date positions received from the data source.
Note that the actual strategy's positions cannot be edited, moved or deleted.
Total strategy
The total strategy is created when you select multiple strategies in the list (except the actual strategy).
This strategy will contain the net positions of the selected strategies.

For example: Let’s say you select from the list strategy “A” with a position of size 4, and “B” strategy with a position of size -7, then the net strategy “A + B” will be created with a position of size -3. The total strategy is also displayed on the profit/loss chart and the Greeks charts.
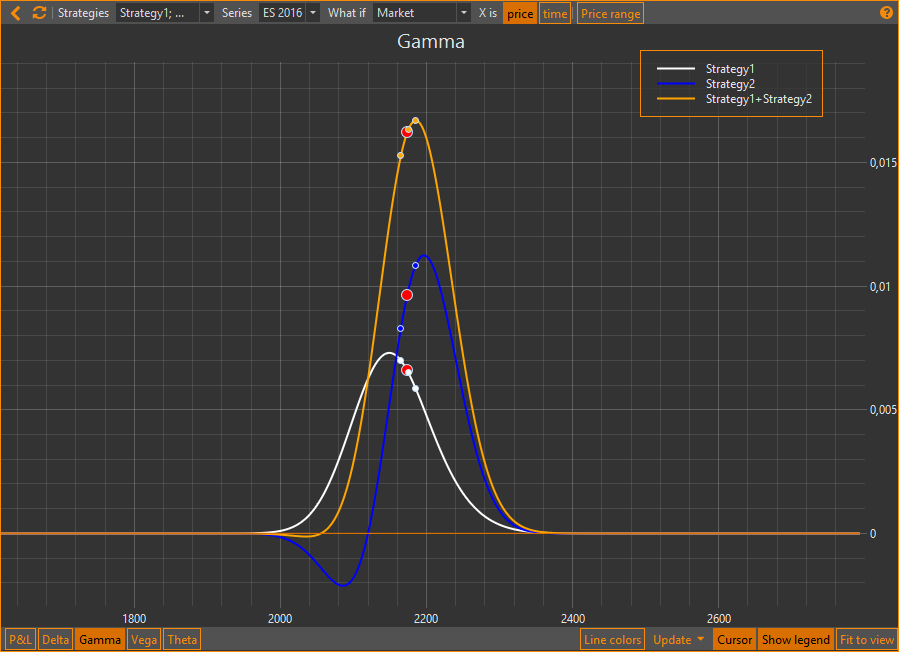
A strategy is temporary. After changing the selection the strategy will be deleted.
Adding strategies
There are two ways to add a new strategy:
- Click the
 button
on the toolbar above the strategies list;
or
 - Right-click on the account and select the Add strategy command from the pop-up menu.
This will open a dialog window where you must:
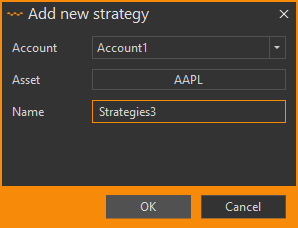
- Select an account from the drop-down list or enter a new account name (it will be created automatically).
- Select an asset from the drop-down list.
- Enter the desired strategy name in the text field.
- Click the OK button (you also may press the Enter key on keyboard).
Note that the account and asset fields will be prefilled with the selected account and asset names.
The strategy name actual is reserved for system-defined strategies.
You cannot create strategies with the actual name.
Copying strategies
In OptionWorkshop there are two ways to copy the strategy:
- Copy only positions. The fills that formed the initial position are not copied. For each position in the initial strategy, a position is created in the new strategy. Under each position, there is only one fill. The fill price is equal to the initial position opening price, and the fill size is equal to the initial position size.
- Copy with fills. Each fill (excluding the adjustment fills) is copied to a new strategy.
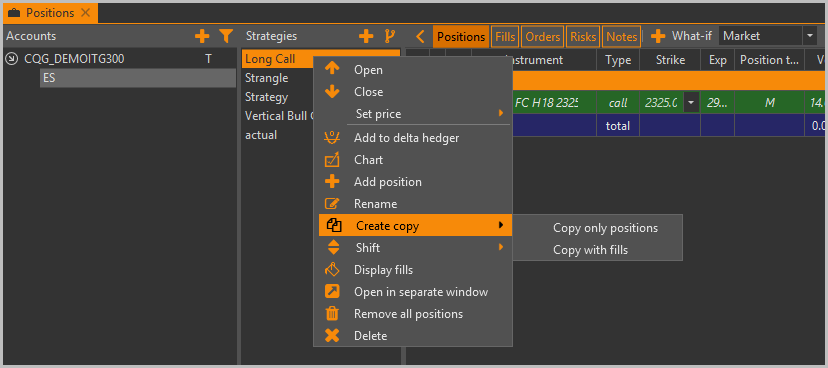
Copy only positions
To copy the strategy:
- Right-click on the strategy name;
- Select the Copy only positions command in the Create copy submenu.
In the Position manager, a duplicate of a strategy is created. Under each position there is only one fill. The fill price is equal to the position opening price, the fill size – the position size.
Copy with fills
To copy the strategy:
- Right-click on the strategy name;
- Select the Copy with fills command in the Create copy submenu.
In the Position manager, a duplicate of the strategy will be created. Each fill (excluding the adjustment fills) is copied to a new strategy.
Adding comments to the strategy
You can add notes/comments to the strategies. To do this:
- Select a strategy.
- Click the Notes button on the top panel.
- Write a comment in the Notes tab.
- Click the
 button.

The note text is displayed when you hover the cursor over a strategy name in the Strategies list.
Renaming strategies
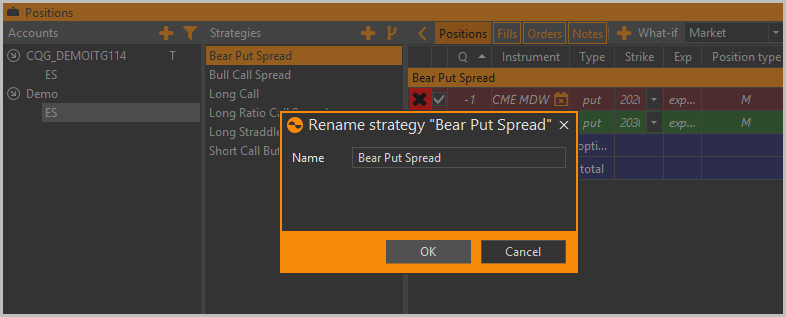
To rename a strategy:
- Double-click on the strategy name or right-click on the strategy and select the Rename command from the menu.
- Enter the strategy name.
- Click the OK button.
Deleting strategies
In order to delete a strategy, right-click on the strategy name in the strategy list to open its context menu.
Then, select the Delete command. Strategies that do not contain any real fills are deleted without confirmation.
The actual strategy cannot be deleted.
To delete the strategies, used by Market maker/Delta hedger/FOS (marked with L), you should first disable the Market maker/Delta hedger/FOS.
Position
Rows in the Positions table are colored by position type:
- Long positions(their size is greater than zero) have a green background
- Short positions(their size is less than zero) have a red background
- Zero positions(their size is equal to zero) have a default gray background
- Total positions (options type)(they show aggregated information on option positions within a strategy) have a violet background
- Total positions (total type)(they show aggregated information of all positions within a strategy) have a violet background

You may view more than one strategy simultaneously by holding down the Ctrl or Shift key on the keyboard while selecting strategies. However, you can only simultaneously view strategies within the same asset portfolio.
The Positions table has the following columns:
 – delete position button (this button will be disabled if a row doesn't
contain a position that can be deleted)
 – exclude positions from the
calculations (see Excluding positions from the calculations)
– exclude positions from the
calculations (see Excluding positions from the calculations)Q – position size
Instrument – instrument's symbol
Type – Call means call option, Put means put option and Fut means futures
Strike – option strike
Position type – R – contains a real fill, M – doesn’t contain any real fills
Exp – number of days until the position instrument's expiration
Vola – volatility
Price – the opening price of a position
Last price – price of the last trade
Theo – theoretical price
PnL – profit/loss (points)
Theta, Vega, Gamma, Delta– option greeks
Volume – position size measured in points, calculated as number of contracts (negative for short positions) multiplied by contract price
PnL(M) – profit/loss (money)
Commission – a total commission of all fills in the position. The commission for the fill is calculated by this formula: the number of contracts in the fill multiplied by the commission size for the contract (see Commission for the fill)
Bid/Ask – best ask/bid prices
Mnns (option moneyness) – shows the option state:
I– in the money,A– at the money,O– out of the money.
Font style indicates a position’s type:
- Positions containing real fills, are displayed in bold
- Positions containing adjusted fills, are displayed in italic
The Position type column also indicates that the position contains real fills:
R– contains a real fillM– doesn’t contain any real fills

Also, OptionWorkshop display fills and positions on instruments that have already expired. Placing the cursor over the row will open a tooltip containing information about position.
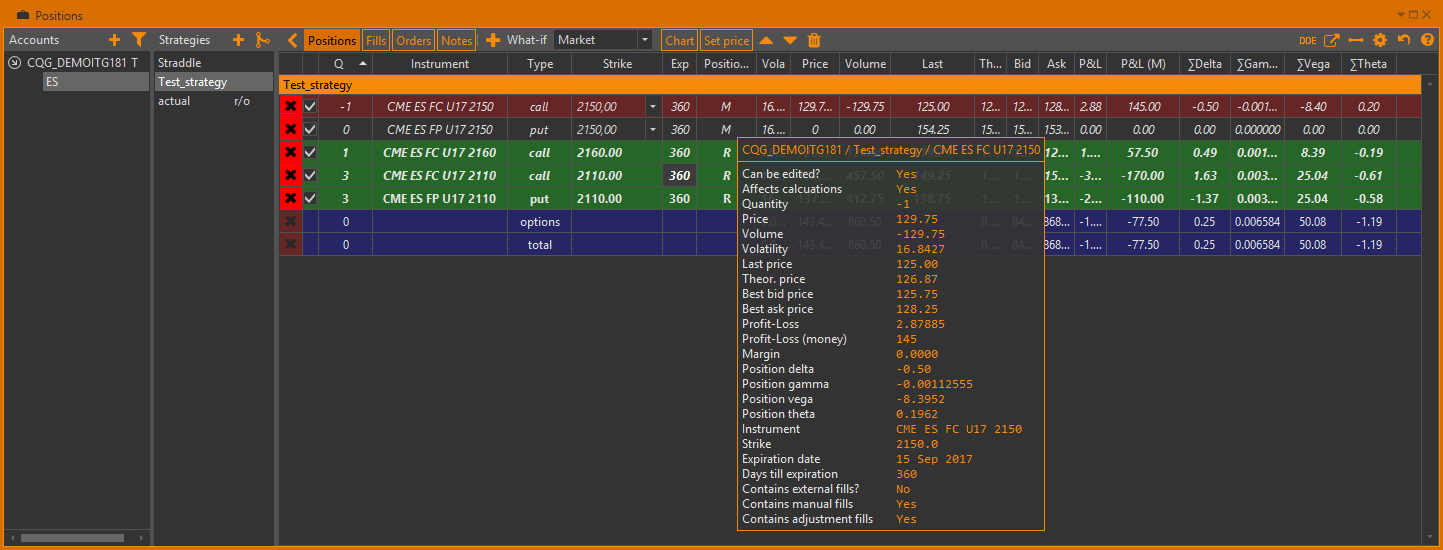
Right-clicking on the position will open a context menu with the following commands:
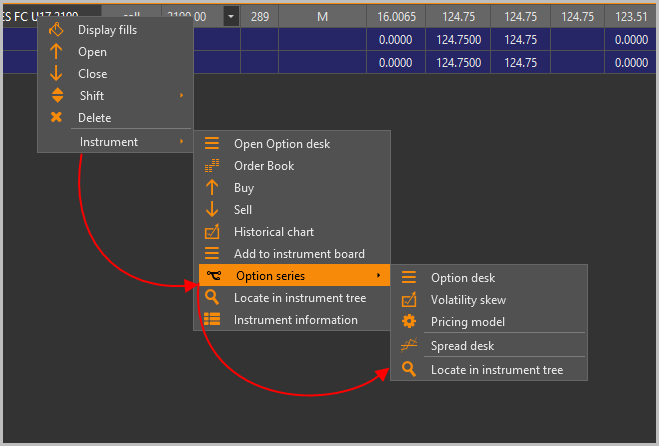
 – Display fills of the position (see Fills manager)
 – place
Buy/Sell orders (see Orders manager)
 – Delete the positions
Shift – change the strike of a single option position (see Changing the strike of option position)
Instrument:
 – open an Option Desk
 – open an Order Book(see Order book)
 – place Buy/Sell
orders (see Orders manager)
 – view a Historical Chart(see Historical chart)
 – add an instrument into the Instruments Board(see Instruments Board)
an Option Series submenu with the following commands:
- Option desk – open an Option Desk;
- Volatility skew – open a Volatility Skew chart;
- Pricing model – configure a Pricing model;
- Spread desk – open a Spread desk.
 – locate an instrument
in the Instruments tree(see Instruments tree)
 – view an instrument information
If a strategy name is not specified the fill and positions will be routed into a strategy according to the routing conditions. More in the Fill routing.
Adding positions
There are two ways to add a position:
- Click the
 button on the toolbar above the positions table; or
 - Right-click on the account or strategy and select the Add position command from the pop-up menu.
This will open a window where you must:
Select an account from the drop-down list or enter a new account name (it will be created automatically).
Select a strategy from the drop-down list or enter a new strategy name (it will be created automatically).
Select an instrument from the instruments tree.
Correct the position, price if necessary.
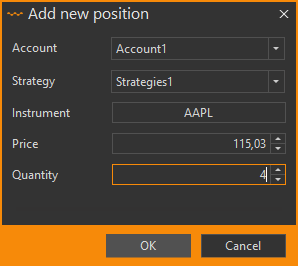
Enter the position quantity.
Click the OK button (you also may press the Enter key on keyboard).
Note that the position cannot be equal to zero. The account and strategy fields will be prefilled with the selected account and strategy names.
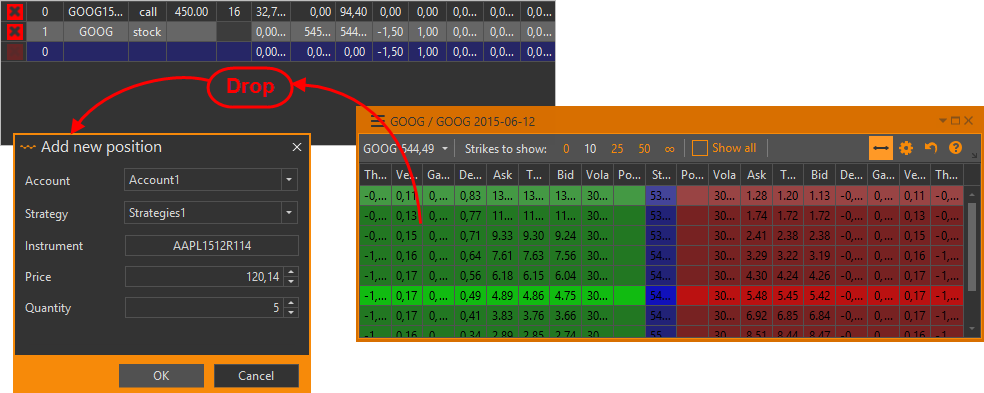
You can add a position by using drag-and-drop. Begin by dragging a row from an Option Desk's table or the Instruments tree and dropping it onto the positions table.
See also:
This action brings up the same dialog window described above, with the Instrument prefilled. You may correct them if you wish. After you confirm your input, a new position will be created.
Note that if a position on a specified instrument already exists in the specified strategy, a new position will not be created. Instead, a new position's size will be added to the existing position's size.
Editing positions
Sometimes you may need to correct a position's size or price. In order to do this, click on the position's size or price to enter editing mode. Then you may enter a new value and confirm your input by pressing the Enter key.
When you change the positions, the fill will be automatically adjusted in the Fills Manager.
Moving positions
Positions can be moved from one strategy into another. Begin by dragging the position from the positions table and dropping it onto the target strategy's name in the strategies list.
Deleting positions
In order to delete a position, click the  button
and the position will be deleted from the strategy.
This action is irreversible and no confirmation is requested.
Note that not every position can be deleted. The actual positions cannot be deleted.
Total positions (they show aggregated information of all positions within a strategy)
also cannot be deleted, no matter what strategy they belong to.
Excluding positions from the calculations
A position can be excluded from the calculation, including total position rows, charts, prices and greeks. To do this, uncheck the checkbox at the beginning of the row.

When you build a chart for a strategy, excluded positions will not affect the chart.
Сhanging the positions’ opening price
You can change the positions’ opening price. Click the Set price button, and a list with following prices will open:
Theo – theoretical price;
Midmarket – midmarket price, which is composed of the average of the bid/ask;
Best – the price of the best codirectional order. In this case, the best bid price will be set for a long position, and best ask price for a short position;
Worst – the price of counter orders. In this case, the best ask price will be set for a long position, and best bid price for a short position;
Last price – the last traded price.

Column display settings
To make the display user-friendly, you can customize some display settings. Settings are configured using the toolbar, located above the main table:
 – add a position
- Chart – view the Strategy charts (see Strategy charts)
- What-if – view the What-if scenarios selection(see What-if scenarios). What-if scenario selection is saved when you switch between the strategies.
 – view positions in a separate window
 – adjust the columns' width to fit the window size
 – reset to default column settings
 – open contextual help
To configure which columns will be visible:
- Click the
 button.
 - Select the checkboxes of the columns you wish to see on the position table.
- Click the OK button to apply the changes.
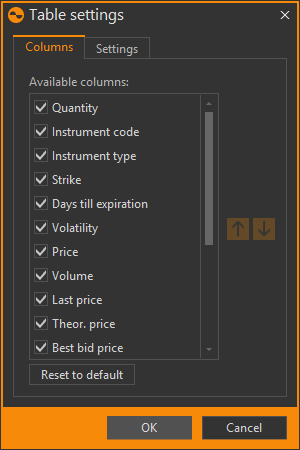
To reorder the columns:
- Click-and-hold the left mouse button on the column to be moved.
- Drag the column to the desired location.
- Release the mouse button to drop the column in its new place.
You can also use the  and
and  buttons in the Column selection window.
To return to the default column order, click the Reset to default button.
In the Settings tab the following options are available:
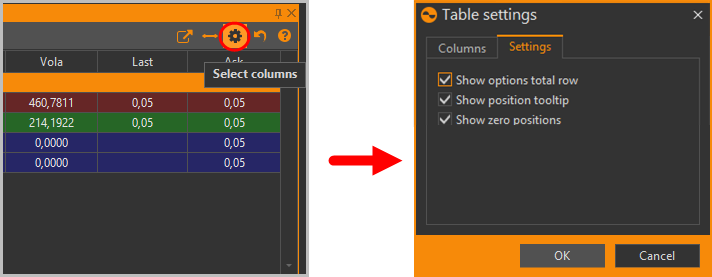
Show options total row – show/hide aggregated information on an option’s position within a strategy.

Show position tooltip – show/hide the tooltip containing information about a position.

Show zero positions – show/hide closed positions.

Fills tab
The general principle of working with fills in OptionWorkshop (fills types, creating and editing, sorting by strategy, etc.) is given here.
You can switch between the positions table and the fills table by using the Fills and Positions buttons on the top panel.
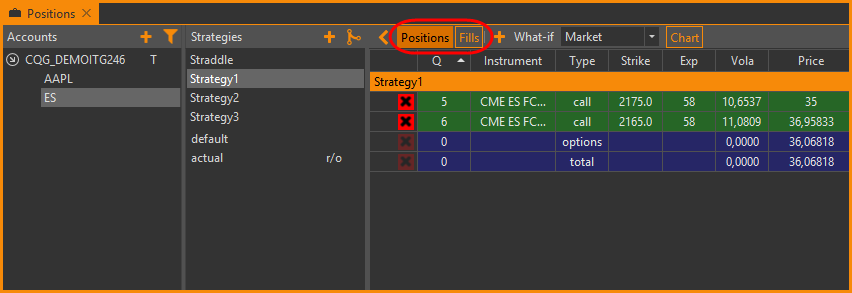
When you click on the Fills button a table with all fills in the strategy will open.
Another way to view all fills in the strategy is to right-click on the strategy and select the Display fills command.


To view the fills of a certain position, right-click on the position row and select the Display fills command.
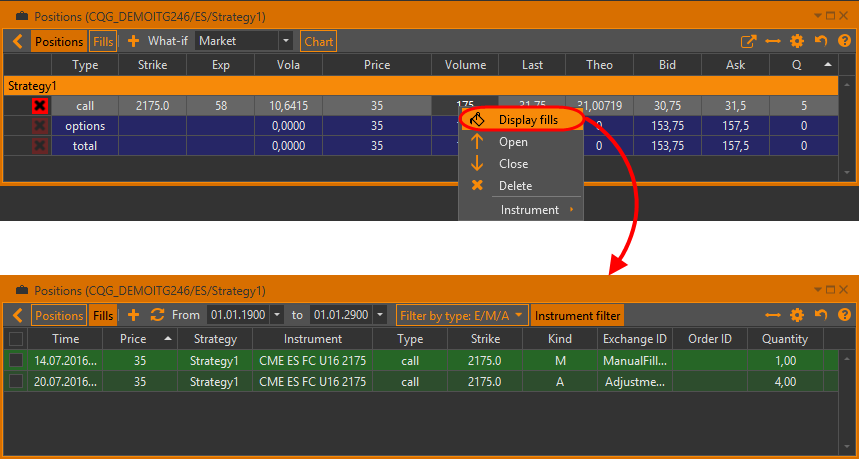
Orders tab
The general principle of working with orders in OptionWorkshop (creating and placing orders, editing, filter settings, etc.) is given here.
Orders tab contains orders that are linked to selected strategies.

The orders table contains the following columns:
- Time – time of the order’s last change
- Exchange ID– order identifier assigned by the trading system
- Strategy – name of the target strategy
- Instrument – order instrument ticker symbol
- Operation – order operation ( Buy or Sell)
- Price – order price
- Quantity – order size. The value is displayed as
n/mwherenis a remaining amount,mis an order size. Whennbecomes equal to zero, an order will be considered as filled - State – the status of execution
- Price step – the step of the price change
- Theo – theoretical price
- Ask – best ask price
- Bid – best bid price
You can manage orders through the controls available on the upper toolbar (enumerated from left to right):
 – add new order
(if you select an order in the list, then by clicking this button a pre-filled form will be opened)
 – edit order
 – cancel order
- Kill all – cancel all active orders
 – to increase and decrease the bid and offer prices.
Prices are updated in one minimum price step
 – to decrease and increase the bid and offer prices.
Prices are updated in one minimum price step
– to decrease and increase the bid and offer prices.
Prices are updated in one minimum price step- Show cancelled – show all cancelled orders
Risks tab
The Risks tab displays one parameter – the total number of underlying contracts to be settled if options in the money are expired right now. In the future, we plan to add several strategy parameters: maximum possible profit and loss, probabilities of profit or loss, and other useful parameters.

Notes tab
Notes tab contains notes/comments to the strategy. To add comment to the strategy:
- Select a strategy.
- Enter a comment in the Notes tab.
- Click the
 button.

The note text is displayed when you hover the cursor over a strategy name in the Strategies list.

